
ഇനി വാഴപ്പിണ്ടി ചുമ്മാ കളയല്ലേ! എത്ര നുള്ളിയാലും തീരാത്ത അത്ര കറിവേപ്പ് വളർത്താൻ കിടിലൻ സൂത്രം ഇതാ!! | Curry Leaves Cultivation Using Vazhapindi (Banana Stem) – Natural Growth Booster
Easy Curry Leaves Cultivation Using Vazhapindi : വീട്ടിൽ വാഴപ്പിണ്ടി ഉണ്ടോ? കറിവേപ്പില നുള്ളി മടുക്കും. ഇനി വാഴപ്പിണ്ടി ചുമ്മാ കളയല്ലേ! ഈ മൂന്ന് സാധങ്ങൾ മാത്രം മതി കറിവേപ്പ് കൊടുംകാടു പോലെ വളർത്താം; എത്ര നുള്ളിയാലും തീരാത്ത അത്ര കറിവേപ്പില വളർത്താം. നമ്മൾ കറികളും മറ്റും ഉണ്ടാകുമ്പോൾ ഏറ്റവും കൂടുതൽ ഉപയോഗിക്കുന്ന ഒന്ന് തന്നെയാണ് കറിവേപ്പില എന്ന് പറയുന്നത്. കറിക്ക് ഗുണവും രുചിയും മണവും ലഭിക്കുന്നതിന് ഒരുപോലെ പ്രധാനപ്പെട്ട ഒന്ന് തന്നെയാണ് കറിവേപ്പില.
Materials Needed:
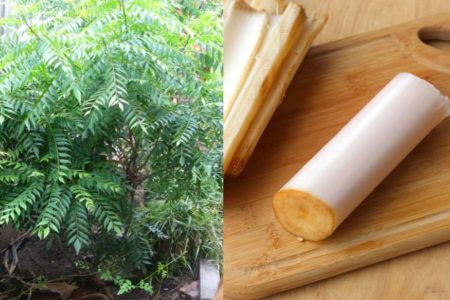
✔️ Curry leaf sapling or seeds
✔️ Chopped vazhapindi (banana stem pieces or paste)
✔️ Nutrient-rich soil mix (garden soil + compost + sand)
✔️ Organic fertilizers (cow dung manure, buttermilk, or rice water)
✔️ A pot or ground space for planting
🌱 How to Use Vazhapindi for Curry Leaf Plant Growth
1️⃣ Prepare the Soil Mix
- Take garden soil + compost + sand in a 2:1:1 ratio for good drainage.
- Chop vazhapindi into small pieces or blend it into a paste.
- Mix vazhapindi pieces/paste into the soil to boost organic nutrients.
2️⃣ Planting the Curry Leaf Sapling or Seeds
- If using a sapling, plant it in the center and gently press the soil around it.
- If using seeds, plant them 1 cm deep and cover lightly with soil.
3️⃣ Watering & Moisture Retention
- Water the plant lightly to keep the soil moist (but not soggy).
- The banana stem retains moisture, reducing water requirements.
4️⃣ Organic Fertilization
- Once a month, add fermented buttermilk, diluted rice water, or cow dung manure for faster growth.
- Vazhapindi slowly decomposes and acts as a natural fertilizer.
5️⃣ Sunlight & Care
- Place the plant in direct sunlight for 4-6 hours daily.
- Trim the top leaves occasionally to encourage bushy growth.
🌟 Benefits of Using Vazhapindi for Curry Leaf Plants
✅ Retains moisture – reduces frequent watering
✅ Enhances soil fertility – natural source of potassium & nutrients
✅ Boosts root strength – leads to faster, healthier growth
✅ Chemical-free & organic – improves plant immunity naturally
💡 Tip: Adding crushed egg shells monthly strengthens the plant!
എന്നും നാടൻ കറിവേപ്പില ആണ് ഇക്കാര്യത്തിൽ മുന്നിൽ നിൽക്കുന്നത്. പലപ്പോഴും മാർക്കറ്റുകളിൽ നിന്ന് വാങ്ങുന്ന കറിവേപ്പില നാടൻ കറിവേപ്പിലയുടെ യഥാർത്ഥ ഗുണം നൽകണമെന്നില്ല. എന്നാൽ വീടുകളിൽ കറിവേപ്പ് നട്ടുവളർത്തു മ്പോൾ ഒരുപാട് കാര്യങ്ങൾ ശ്രദ്ധിക്കേ ണ്ടതുണ്ട്. പലപ്പോഴും കറിവേപ്പ് നട്ടു കഴിഞ്ഞാൽ കൃത്യമായ പരിപാലനം ലഭിക്കാത്തതുമൂലം അത് മുരടിച്ചു പോവുകയും കരിഞ്ഞു പോകുന്നതിനു കാരണമായി തീരാറുണ്ട്.
ഈ സാഹചര്യത്തിൽ കറിവേപ്പിന്റെ പരിപാലനത്തിന് ആവശ്യമായ നിരവധി കാര്യങ്ങൾ ഇന്ന് ചർച്ച ചെയ്യുന്നുണ്ട്. ആദ്യം തന്നെ ശ്രദ്ധിക്കേണ്ടത് ഒരിക്കലും വേരിൽ നിന്ന് കിളിർക്കുന്ന കറിവേപ്പ് പറിച്ച് മാറ്റുകയോ പുതിയതായി വളരുന്നതിന് വളവും മറ്റും നൽകുകയോ ചെയ്യാതിരിക്കുകയാണ്. ഇങ്ങനെ വളർന്നുവരുന്ന കറിവേപ്പിന് താഴ്വേർ ഇല്ലാത്തതുകൊണ്ട് തന്നെ നമ്മൾ എത്ര പരിപാലനം നൽകിയാലും കുറച്ചു കഴിയുമ്പോൾ അത് നശിച്ചു പോകുന്നതിനാണ് സാഹചര്യമൊരുക്കുക.
അതിനുപകരം കമ്പ് മുറിച്ചോ കുരു നട്ട് കിളിർപ്പിച്ചോ പുതിയ കറിവേപ്പിൻ തൈകൾ ഉണ്ടാക്കി എടുക്കാവുന്നതാണ്. എങ്ങനെയാണ് കറിവേപ്പിന്റെ കമ്പ് മുറിച്ച് നടുന്നത് എന്നറിയാൻ വീഡിയോ മുഴുവനായും കാണുക. മൂന്നു വസ്തുക്കൾ മാത്രം ഉപയോഗിച്ചു കൊണ്ട് കറിവേപ്പിന് പരിപാലനം നൽകേണ്ടത് എങ്ങനെയാണ് എന്നാണ് ഇനി പറയുന്നത്. ഏവർക്കും വളരെയധികം ഉപകാരപ്രദമായ അറിവ്. Video Credits : Rema’s Terrace Garden