
ഈ ഒരു പാട്ട മാത്രം മതി ഉള്ളി പറിച്ച് മടുക്കും! ഒരു ചെറിയ കഷ്ണം ഉള്ളിയിൽ നിന്നും കിലോ കണക്കിന് ചുവന്നുള്ളി പറിക്കാം!! | Ulli (Onion) Krishi Tips Using Irumbu Paatta (Iron Tray)
Ulli krishi Tips Using Irumbu Paatta : കടകളിൽ നിന്നും സ്ഥിരമായി വാങ്ങേണ്ടി വരാറുള്ള ചില പച്ചക്കറികൾ ഉണ്ടാവും. പ്രത്യേകിച്ച് ചെറിയ ഉള്ളി, സവാള, ഉരുളക്കിഴങ്ങ് പോലുള്ളവ എത്ര നട്ടുപിടിപ്പിച്ചാലും വീട്ടിൽ വളർത്തിയെടുക്കുക എന്നത് എളുപ്പമുള്ള കാര്യമല്ല. എന്നാൽ ചെറിയ ചില കാര്യങ്ങൾ ശ്രദ്ധിക്കുകയാണെങ്കിൽ അടുക്കള ആവശ്യത്തിന് ഉള്ള ചെറിയ ഉള്ളി വീട്ടിൽ നിന്ന് തന്നെ ലഭിക്കുന്നതാണ്. അതിന് ആവശ്യമായ കാര്യങ്ങൾ എന്തെല്ലാമാണെന്ന് വിശദമായി മനസ്സിലാക്കാം.
Choosing the Right Iron Tray
- Use a flat, shallow iron tray with a depth of at least 3-4 inches.
- Ensure the tray has drainage holes or create small holes at the bottom to prevent waterlogging.
🌱 2. Best Soil Mix for Healthy Growth
- Use a loose, well-draining soil mix:
✅ Garden soil (50%)
✅ Cocopeat or sand (30%) for aeration
✅ Organic compost or cow dung manure (20%) for nutrients
🌞 3. Sunlight & Placement
- Place the tray in an area with at least 5-6 hours of sunlight daily.
- If growing indoors, keep near a sunny window or balcony.
💦 4. Watering Tips
- Water lightly every 2-3 days—onions don’t like too much moisture.
- Avoid overwatering to prevent fungal infections and rot.
- If leaves start turning yellow, reduce watering.
🌱 5. Planting Method
✅ Using Onion Bulbs (Easiest Method)
- Select small onions with sprouted tips.
- Place them half-buried in the soil, with the sprout facing upwards.
- Space them 2-3 inches apart to allow proper growth.
✅ Using Onion Seeds (Slower, But Effective)
- Scatter onion seeds evenly over the soil.
- Cover lightly with a thin layer of soil.
- Keep the soil moist but not soggy until germination occurs in 7-10 days.
🌿 6. Fertilization for Faster Growth
- Use organic liquid fertilizer (like cow dung water or onion peel fertilizer) every 10-15 days.
- Banana peel fertilizer or compost tea helps boost nutrient levels naturally.
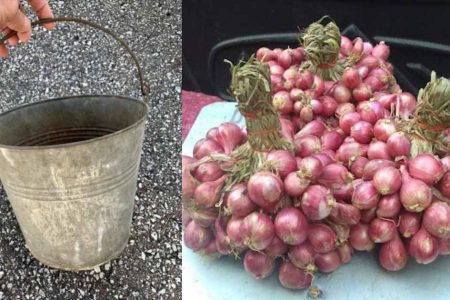
ചെറിയ ഉള്ളി മുളപ്പിച്ചെടുക്കാനായി ആദ്യം തന്നെ ഒരു വലിയ ബക്കറ്റ് ആവശ്യമാണ്. വീട്ടിൽ ഉപയോഗിക്കാതെ ഇരിക്കുന്ന സ്റ്റീൽ ബക്കറ്റുകൾ ഉണ്ടെങ്കിൽ അതുതന്നെ തിരഞ്ഞെടുക്കാം. ശേഷം അതിന്റെ ഏറ്റവും താഴത്തെ ലയറിൽ ഒരു പിടി അളവിൽ കരിയില ഇട്ടുകൊടുക്കുക. ഇങ്ങനെ ചെയ്യുകയാണെങ്കിൽ അത് ബക്കറ്റിന്റെ കനം കുറയ്ക്കുകയും അതേസമയം മണ്ണിലേക്ക് നല്ലതുപോലെ വളം ഇറങ്ങാനും സഹായിക്കുന്നതാണ്.
കരിയിലയുടെ മുകളിലായി അടുക്കളയിലെ ജൈവ വേസ്റ്റ് മിക്സ് ചെയ്ത് ഉണ്ടാക്കിയ പോട്ടിംഗ് മിക്സ് ഇട്ടു കൊടുക്കാവുന്നതാണ്. പോട്ടിങ് മിക്സ് തയ്യാറാക്കാനായി അടുക്കളയിൽ നിന്നും കിട്ടുന്ന പച്ചക്കറി വേസ്റ്റ് എല്ലാം മണ്ണിൽ ഇട്ടുവച്ചാൽ മാത്രം മതി. വീണ്ടും മണ്ണിനു മുകളിലായി ഒരു ലയർ കരിയില കൂടി ഇട്ടു കൊടുക്കുക. ഈയൊരു രീതിയിൽ ബക്കറ്റിന്റെ ഏറ്റവും മുഗൾ ഭാഗത്ത് മണ്ണ് വരുന്ന രീതിയിൽ ഫിൽ ചെയ്തു വയ്ക്കുക.
ഈയൊരു പാത്രത്തിലേക്കാണ് മുളപ്പിച്ചു വെച്ച ഉള്ളി നട്ടു കൊടുക്കേണ്ടത്. ഉള്ളി മുളപ്പിക്കാനായി കുറഞ്ഞത് 15 ദിവസമെങ്കിലും വെള്ളം നനച്ച് ചെറിയ ഒരു ചിരട്ടയിലോ മറ്റോ വച്ചു കൊടുത്താൽ മതിയാകും. ഇത്തരത്തിൽ മുളച്ചുവന്ന ഉള്ളി ഓരോന്നായി ബക്കറ്റിന്റെ പല ഭാഗങ്ങളിലായി നട്ടുപിടിപ്പിക്കാവുന്നതാണ്. ശേഷം ഒന്നിടവിട്ട ദിവസങ്ങളിൽ അല്പം വെള്ളം തൂവി കൊടുത്താൽ മതിയാകും. കൂടുതൽ വിശദമായി മനസ്സിലാക്കാൻ വീഡിയോ കാണാവുന്നതാണ്. Video Credit : POPPY HAPPY VLOGS